

How To Charge A Solar Light Faster While Camping
How can you charge a solar light faster while camping?
To charge a solar light faster while camping, place it under direct sunlight for 6–10 hours, angle the solar panel toward the sun, and keep it clean from dust or moisture. Use reflective surfaces like foil or light-colored gear to boost exposure. For best results, avoid shade and charge during peak midday sunlight for maximum energy absorption.
How To Charge A Solar Light Faster While Camping
⏱ 5 min read
Struggling with a dim lantern right when night falls over your campsite? You’re not alone. Many campers face the same frustration—waiting for solar lights to charge while the sun disappears too quickly behind trees or clouds. So how do you make sure your light is fully powered when you actually need it most? This guide shows practical, real-world methods to maximize charging speed and keep your campsite bright, safe, and stress-free.
Why solar charging speed matters outdoors
When camping, light isn’t just convenience—it’s safety. Slow-charging lanterns can leave you in darkness during cooking, setting up tents, or nighttime hikes. Weather shifts, tree cover, and short daylight hours all reduce charging efficiency, especially in forests or mountainous campsites.
That’s why understanding how to optimize solar charging becomes essential for every outdoor setup.
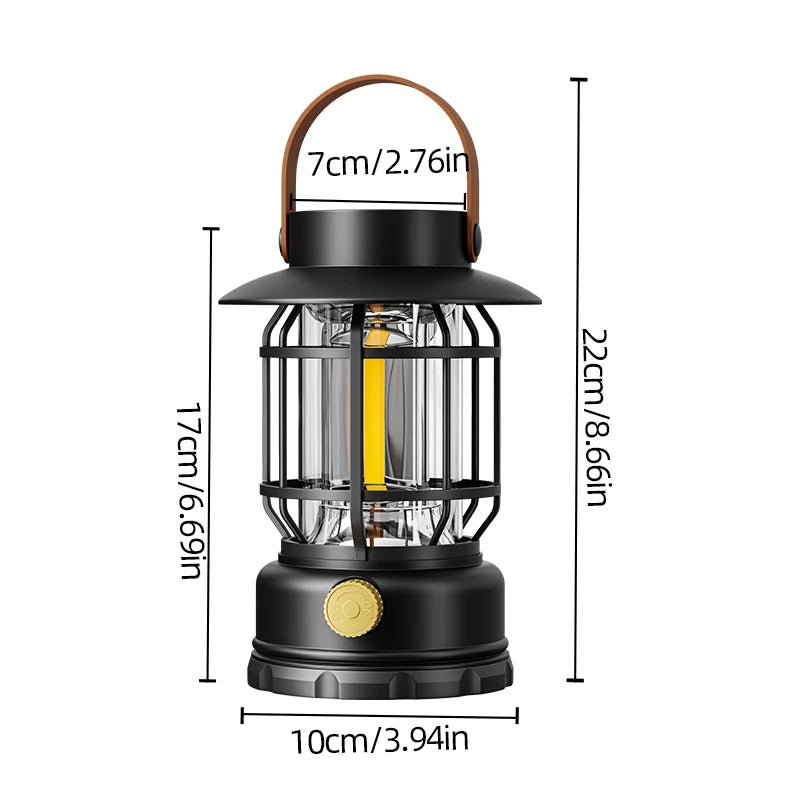
💡 See it in action
👉 Discover must-have camping gear that keeps your nights brighter and safer on every adventure.
Many campers rely on solar lighting for tents and trails, but few understand how placement, timing, and environmental factors affect charging speed. Let’s fix that.
How to charge a solar light faster while camping
How to charge a solar light efficiently depends on sunlight exposure, angle positioning, and panel cleanliness. The primary keyword how to charge a solar light becomes simple when you maximize direct sun exposure, avoid shade, and use reflective surfaces to amplify light absorption during peak daylight hours.
Small adjustments can significantly improve charging speed—even in less-than-perfect conditions.
Key benefits of optimizing solar charging
- Faster full battery charge before sunset
- Longer-lasting illumination at night
- More reliable emergency lighting during outages
- Reduced dependence on backup power sources
Understanding these benefits helps you plan smarter campsite setups instead of relying on unpredictable charging conditions.
Best conditions for faster solar charging
Solar performance depends heavily on environment. Even high-quality lanterns struggle in shaded or cloudy conditions if not positioned correctly.
| Condition | Impact on Charging | Optimization Tip |
|---|---|---|
| Direct sunlight | Fastest charging | Place on elevated open surfaces |
| Partial shade | Moderate charging | Rotate every 1–2 hours |
| Cloudy weather | Slow charging | Use reflective surfaces |
| Forest camps | Very slow charging | Move toward open clearing |
Even small improvements in positioning can increase efficiency dramatically when daylight is limited.
Step-by-step methods for faster solar charging
- Find direct sunlight – Avoid trees, tents, or gear shadows blocking the panel.
- Angle toward the sun – Tilt the solar panel to face sunlight directly for maximum absorption.
- Clean the panel – Dust, dirt, or water reduces charging efficiency.
- Elevate your lantern – Place it on backpacks or rocks instead of ground level.
- Use reflective support – Position near light-colored surfaces or foil to amplify exposure.
These simple steps help campers get the most out of limited daylight hours, especially during short winter days or forest-heavy trails.
How using solar USB camping lantern improves flexibility
Solar USB hybrid lanterns offer dual charging options—solar and USB. This flexibility is essential when sunlight is weak or unavailable. Many campers prefer these models because they reduce dependency on weather conditions and allow backup charging via power banks or vehicles.
👉 Learn how to choose the right lighting setup for your next hiking or camping trip.
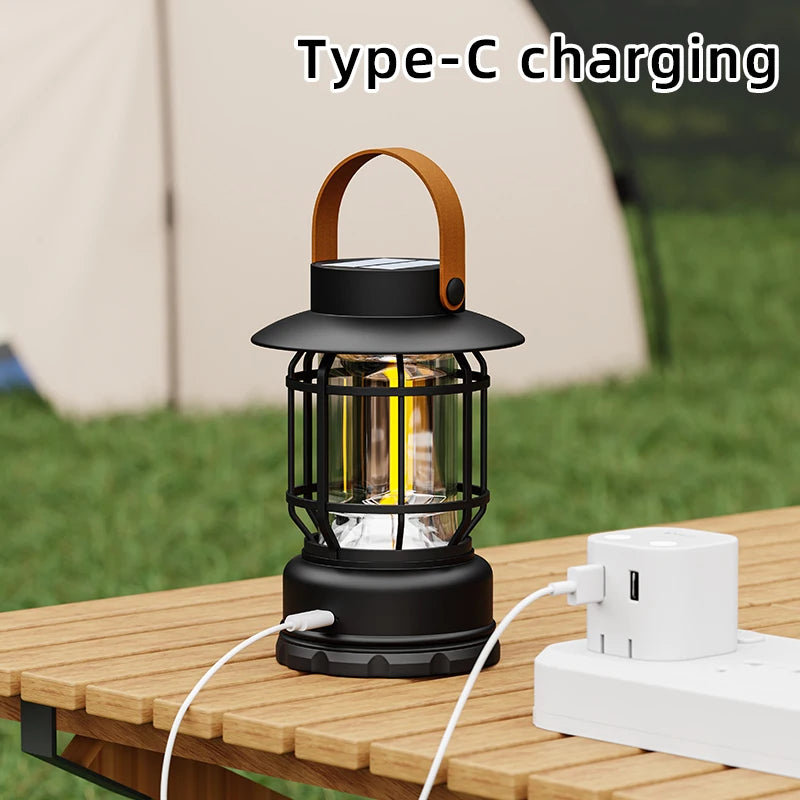
💡 See it in action
When using a solar USB camping lantern, prioritize USB charging before trips, then switch to solar maintenance mode during camping to extend battery life efficiently.
USB vs solar charging performance
| Charging Method | Speed | Best Use Case |
|---|---|---|
| USB charging | Fast | Pre-trip full charge |
| Solar charging | Moderate to slow | Outdoor maintenance |
| Hybrid use | Optimized | Extended camping trips |
This hybrid approach ensures your light is never completely dependent on weather conditions.
Extending battery life camping lantern techniques
Battery health plays a major role in how long your solar lantern performs during trips. Even a fully charged lantern will drain quickly if not used efficiently.
Practical battery-saving habits
- Use low brightness mode when full brightness isn’t needed
- Turn off lantern during daylight hours
- Avoid overcharging when using USB input
- Store in moderate temperature conditions
These habits directly improve performance and ensure longer usability over multiple camping nights.
Gear setup tips for better solar lighting efficiency
Choosing the right camping setup can dramatically improve lighting performance. Lightweight and reflective gear helps maximize sunlight exposure for charging devices.
Pair your lighting setup with items from Camping Storage & Boxes to keep gear organized and exposed during daylight hours.
You can also enhance your campsite setup with Camping & Picnic gear for better placement flexibility and mobility.
For night safety, combine lighting with Safety, Survival & Emergency essentials to ensure preparedness in unpredictable environments.
Solar charging performance checklist
| Factor | Good Setup | Poor Setup |
|---|---|---|
| Sun exposure | Direct, uninterrupted | Shaded or partial |
| Panel condition | Clean and dry | Dusty or wet |
| Placement | Elevated and angled | Flat ground or hidden |
| Charging time | 6–8 hours | 10+ hours or incomplete |
This comparison helps campers quickly identify mistakes that reduce charging efficiency.
Recommended solar lantern setup for campers
For reliable performance, a hybrid lantern that supports both solar and USB charging offers the most flexibility. It ensures you always have light—even when the weather changes unexpectedly or you’re deep in shaded terrain.
One strong option is a compact, dual-use lighting solution designed for camping, hiking, and emergency use.
View Solar USB Camping Lantern for a versatile lighting upgrade that supports fast charging and long-lasting outdoor performance.

💡 See it in action
Why this type of lantern works better
- Dual charging (solar + USB flexibility)
- Lightweight for backpacking trips
- Durable for outdoor conditions
- Suitable for tents, trails, and emergencies
Combining smart charging habits with reliable gear ensures you’re never left in the dark during outdoor adventures.
FAQ: Charging solar lights while camping
How long does it take to fully charge a solar lantern?
Most solar lanterns take 6–10 hours of direct sunlight to fully charge. Cloudy weather or shaded areas may extend this time significantly.
Can I charge a solar lantern without sunlight?
Yes, many modern models support USB charging, allowing you to charge from power banks, cars, or portable power sources.
What is the best position for solar charging?
Place the lantern in direct sunlight, angled toward the sun, and elevated above ground obstacles for maximum exposure.
How can I make my solar lantern last longer at night?
Use lower brightness settings, turn it off during daylight, and avoid unnecessary full brightness use to conserve battery life.
Does cold weather affect solar charging?
Cold weather may slow battery efficiency slightly, but sunlight exposure remains the key factor in charging performance.
Related Articles:
- Hanging Camping Lamp Placement Tips For Better Tent Light
- Rechargeable Lantern For Power Outage Setup Made Simple
- Tent Lighting Camping Tips For Safer Night Visibility
- Lighting For Camping Tents Without Waking Everyone Up
Pillar Articles:





