

Packing A Cooler: Step-By-Step Guide For Fresh Food All Day
Packing A Cooler: Step-By-Step Guide For Fresh Food All Day
⏱ 12 min read
What Is The Best Way To Start Packing A Cooler?
Packing a cooler correctly keeps food colder, reduces spoilage risk, prevents soggy meals, and helps drinks stay chilled for hours. By using the right ice ratio, layering system, and food organization method, you can keep picnic food fresh all day while making outdoor meals simpler and safer.
- Pre-chill the cooler before use.
- Use plenty of ice or frozen packs.
- Separate drinks from food when possible.
- Place raw foods at the bottom.
- Keep frequently used items on top.
Packing a cooler correctly can make or break an outdoor adventure. Whether you're planning a family picnic, a beach day, a road trip, or a weekend camping escape, keeping food cold and safe is one of the biggest challenges. Have you ever opened your cooler at lunchtime only to discover warm drinks, soggy sandwiches, and melting ice? The good news is that a few simple techniques can dramatically improve your results.
👉 Planning an outdoor adventure? Explore the Camping & Picnic collection and see how the 30L Cooler Bag Insulated Backpack simplifies food transport on busy travel days.
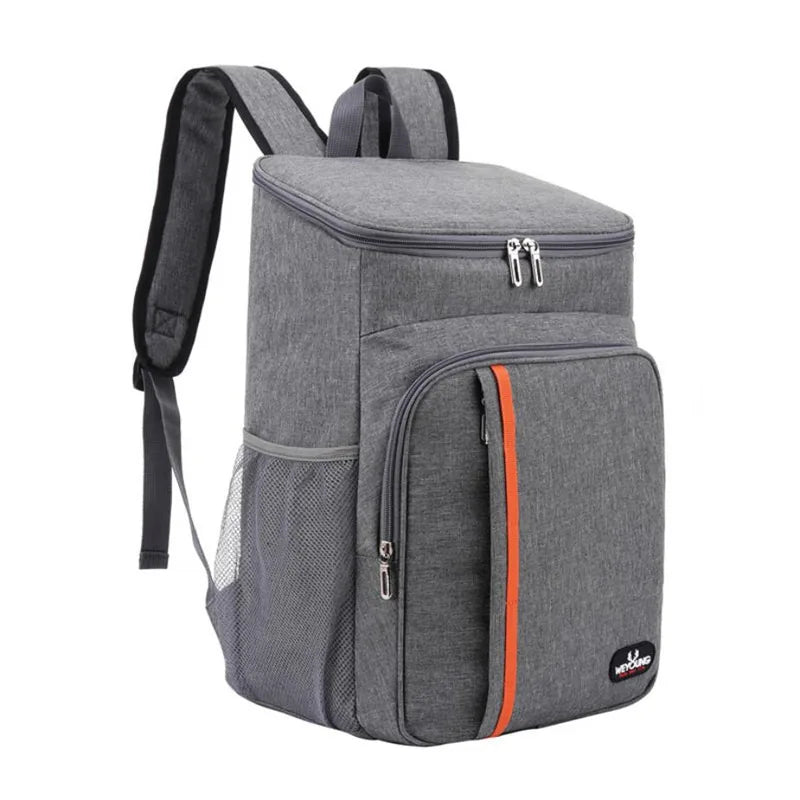
💡 See it in action
Why Proper Cooler Packing Matters
Many people focus on buying ice but overlook organization. The way you arrange food inside a cooler has a direct impact on temperature retention.
Cold air naturally sinks. When food and ice are placed randomly, warm pockets develop, causing some items to lose safe temperatures much faster than others.
Proper packing helps:
- Keep food at safe temperatures longer.
- Reduce ice melt.
- Prevent leaks and contamination.
- Improve access during meals.
- Extend outdoor enjoyment.
| Poor Packing | Smart Packing |
|---|---|
| Warm food zones | Consistent cooling |
| Fast ice melt | Longer ice retention |
| Soggy food | Dry organized storage |
| Frequent lid opening | Efficient access |
How Does Packing A Cooler Work Step By Step?
Packing a cooler works best when you pre-chill the cooler, layer ice on the bottom, place cold foods strategically, separate items by usage frequency, and fill empty spaces with ice. This method improves cooling efficiency and helps maintain safe food temperatures throughout the day.
Step 1: Pre-Chill The Cooler
Never start with a warm cooler.
Add sacrificial ice a few hours before packing. This lowers the internal temperature and prevents your main ice supply from melting immediately.
Step 2: Chill Food Before Packing
A cooler is designed to maintain cold temperatures, not create them.
Place food and beverages in the refrigerator overnight before your trip.
Step 3: Build A Cold Base
Start with a thick layer of ice, frozen gel packs, or frozen water bottles.
Frozen bottles offer dual benefits because they provide drinking water once thawed.
Step 4: Add Raw Foods First
If carrying raw meat, seafood, or poultry, place them in leak-proof containers at the bottom.
This prevents juices from contaminating ready-to-eat foods.
Step 5: Layer Ready-To-Eat Foods
Place sandwiches, fruit, salads, and snacks above raw foods.
Use airtight containers from the Food Storage Bags & Containers collection to reduce moisture exposure.
Step 6: Top With Additional Ice
A top layer of ice creates a cooling blanket that helps maintain temperature when the lid opens.
Step 7: Store Frequently Used Items On Top
Drinks, snacks, and quick-grab foods should be accessible without digging through the cooler.
How The Right Ice Ratio Keeps Food Fresh Longer
One of the most overlooked aspects of packing a cooler is the ice-to-food ratio.
Outdoor experts commonly recommend approximately two-thirds ice and one-third contents for maximum cooling performance during hot-weather adventures.
| Trip Duration | Recommended Ice Ratio |
|---|---|
| Half Day | 50% ice |
| 1 Day | 60% ice |
| Weekend | 66% ice |
| Multi-Day Camping | 70%+ ice |
When possible, combine cubed ice, block ice, and frozen water bottles for improved performance.
Block ice melts slower than small cubes and can dramatically extend cooling time.
Best Ways To Pack Cooler Backpacks For Travel And Day Trips
Cooler backpacks offer portability but require efficient space management.
The best ways to pack cooler backpacks involve minimizing air gaps, using compact containers, organizing by meal timing, and balancing weight evenly. Smart packing keeps temperatures stable while improving carrying comfort during hikes, picnics, beach outings, and sightseeing adventures.
👉 Looking for a practical carrying solution? The 30L Cooler Bag Insulated Backpack combines portability, insulation, and organization for day trips and outdoor meals.
- Use flat containers instead of bulky bowls.
- Freeze juice boxes before packing.
- Place heavier items near your back.
- Fill unused space with ice packs.
- Keep snacks near the top.
Many families pair cooler backpacks with gear from the Lightweight Daypacks collection for additional storage during longer excursions.
Travelers often report that switching from hard coolers to insulated backpack coolers reduces carrying fatigue while maintaining excellent cooling performance.
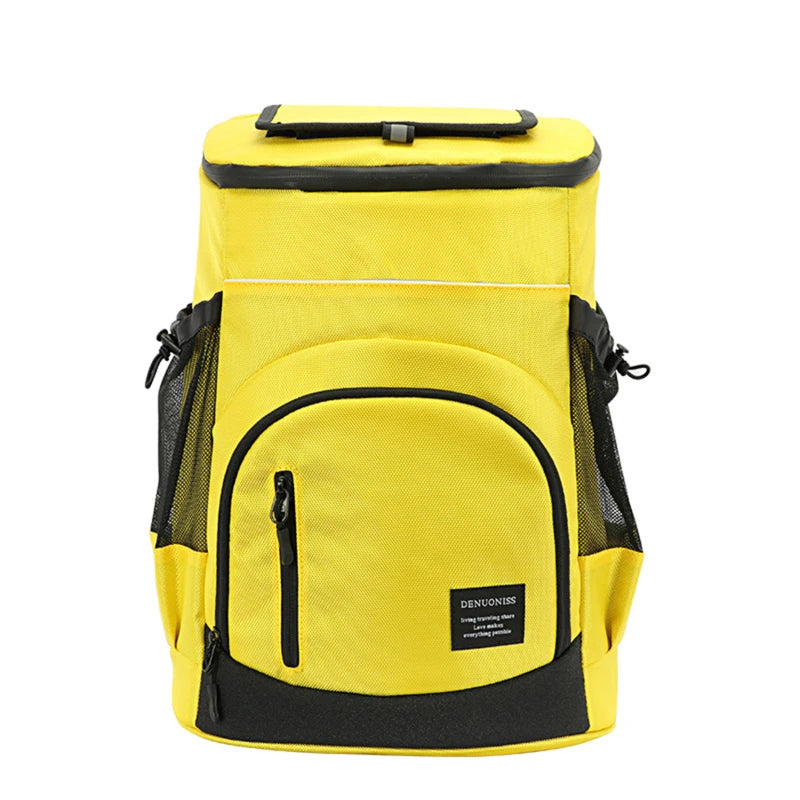
💡 See it in action
Food Safety Tips For Outdoor Trips Everyone Should Follow
Food safety becomes increasingly important when temperatures rise.
Following food safety tips for outdoor trips helps reduce the risk of bacterial growth and foodborne illness. Safe cooling, proper separation of raw and ready-to-eat foods, temperature monitoring, and minimizing lid openings are simple habits that protect everyone at the campsite, beach, or picnic area.
Keep Cold Foods Below 40°F
Food should remain below 40°F whenever possible.
Separate Raw And Ready-To-Eat Foods
Use sealed containers to prevent cross-contamination.
Limit Lid Openings
Every opening releases valuable cold air.
Use Multiple Coolers
Consider one cooler for food and another for drinks.
Discard Unsafe Food
If food has remained warm for extended periods, it is safer to replace it than risk illness.
Helpful Gear For Outdoor Food Management
How To Keep Drinks Cold Longer On Hot Days
Warm beverages can ruin an otherwise enjoyable outing.
Learning how to keep drinks cold longer starts with pre-chilling beverages, using frozen bottles, limiting sunlight exposure, and separating drink storage from meal storage. These techniques reduce temperature fluctuations and extend cooling performance even during hot summer conditions.
- Refrigerate drinks overnight.
- Freeze some bottles completely.
- Store cooler in shade.
- Use reflective covers when possible.
- Avoid unnecessary lid openings.
- Keep cooler elevated from hot surfaces.
For added protection from direct sunlight, many campers combine their food setup with equipment from the Sun Shades & Canopies collection.
Common Cooler Packing Mistakes That Cause Fast Ice Melt
| Mistake | Better Alternative |
|---|---|
| Packing warm food | Pre-chill everything |
| Too little ice | Maintain proper ice ratio |
| Frequent lid openings | Organize by usage frequency |
| Large air gaps | Fill empty spaces |
| Direct sun exposure | Keep cooler shaded |
Another common mistake is forgetting the overall outdoor setup.
Comfortable meal experiences often involve accessories from Folding Chairs & Tables, Picnic Mats & Blankets, and Group Picnic Accessories.
A Practical Cooler Packing Checklist
- Pre-chilled cooler
- Frozen ice packs
- Block ice
- Cold beverages
- Sealed food containers
- Sandwiches and snacks
- Fresh fruit
- Paper towels
- Trash bags
- Reusable utensils
- Water bottles
- Backup ice
Many experienced campers also keep additional supplies organized using products from Camping Storage & Boxes and Gear Organizers & Pouches.
Real Outdoor Experiences From Cooler Backpack Users
"Our family beach trips used to end with melted ice and warm drinks. After organizing food into layers and using frozen water bottles, everything stayed cold until sunset."
"Switching to an insulated cooler backpack made hiking lunches much easier. The weight felt balanced and food stayed fresh for the entire day."
"Separating drinks from meals reduced cooler openings dramatically. Ice lasted much longer than before."
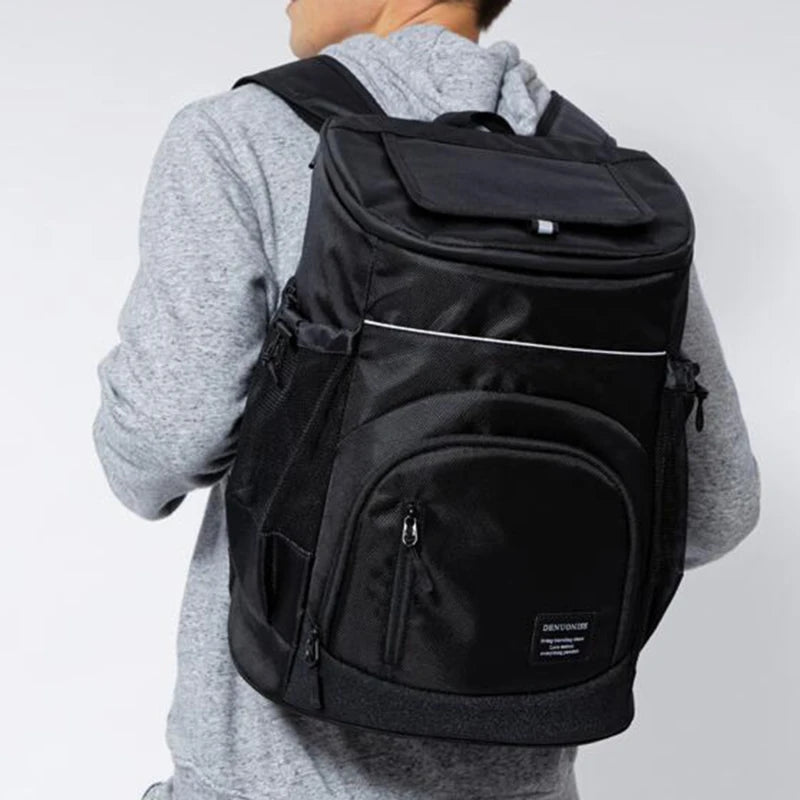
💡 See it in action
Why An Insulated Backpack Cooler Simplifies Outdoor Meals
For families, travelers, and outdoor enthusiasts, a dedicated insulated backpack cooler can simplify every stage of the trip.
Benefits include:
- Hands-free carrying.
- Better mobility on trails.
- Easy organization.
- Improved comfort.
- Reliable insulation.
👉 Get ready before your next adventure. Explore the 30L Cooler Bag Insulated Backpack and pair it with essentials from Camping & Picnic for a smoother outdoor dining experience.
Conclusion
Packing a cooler successfully is about more than adding ice. Pre-chilling, proper layering, smart food organization, and safe handling practices work together to keep meals fresh and enjoyable throughout the day.
Whether you're heading to a campsite, beach, road trip destination, or neighborhood park, these simple strategies help reduce waste, improve food safety, and keep everyone comfortable from breakfast to sunset.
Frequently Asked Questions
What is the best ice ratio when packing a cooler?
For most day trips, aim for roughly 60% ice and 40% food and beverages. Longer trips may require up to two-thirds ice.
How long can food stay safe inside a cooler?
Food can remain safe as long as temperatures stay below 40°F and the cooler is properly packed with sufficient ice.
Should drinks and food be stored together?
Using separate coolers often improves efficiency because drinks usually cause more frequent lid openings.
What are the best ways to pack cooler backpacks?
Use compact containers, eliminate empty spaces, distribute weight evenly, and keep frequently used items accessible near the top.
How do I keep picnic food fresh all day?
Pre-chill all items, use adequate ice, minimize lid openings, keep the cooler shaded, and separate raw foods from ready-to-eat foods.
Related Articles:
- Insulated Backpack For Beach Trips: How To Pack Efficiently
- Food To Pack For A Picnic: Easy Setup For A Stress-Free Day
- Insulated Bag For Picnics: How To Pack It Right Step By Step
- Hands Free Cooler: How To Carry Drinks Without Spills
Pillar Articles:





