
Stripped Screws On Electronics Devices: How To Remove Them Easily
How do you remove stripped screws on electronics devices easily?
Stripped screws on electronics devices can often be removed using the correct precision bit, a rubber band for added grip, or a dedicated extraction tool. An s2 steel screwdriver bit set improves contact with damaged screw heads, reduces slipping, and helps protect delicate electronic components during repair.
⏱ 8 min read
Stripped Screws On Electronics Devices: How To Remove Them Easily
Stripped screws on electronics devices can turn a quick repair into a frustrating experience. Whether you're replacing a laptop battery, upgrading storage, repairing a gaming controller, or tightening a loose smartphone component, damaged screws can stop progress instantly. The good news is that with the right tools, techniques, and patience, most stripped screws can be removed safely without damaging your device. This guide covers proven removal methods, explains why an s2 steel screwdriver bit set matters, and shows how to fix electronics with precision screwdriver techniques that improve repair success.
A quality 32-in-1 Precision Screwdriver Set can help prevent stripped screws before they happen and make electronics repairs significantly easier.
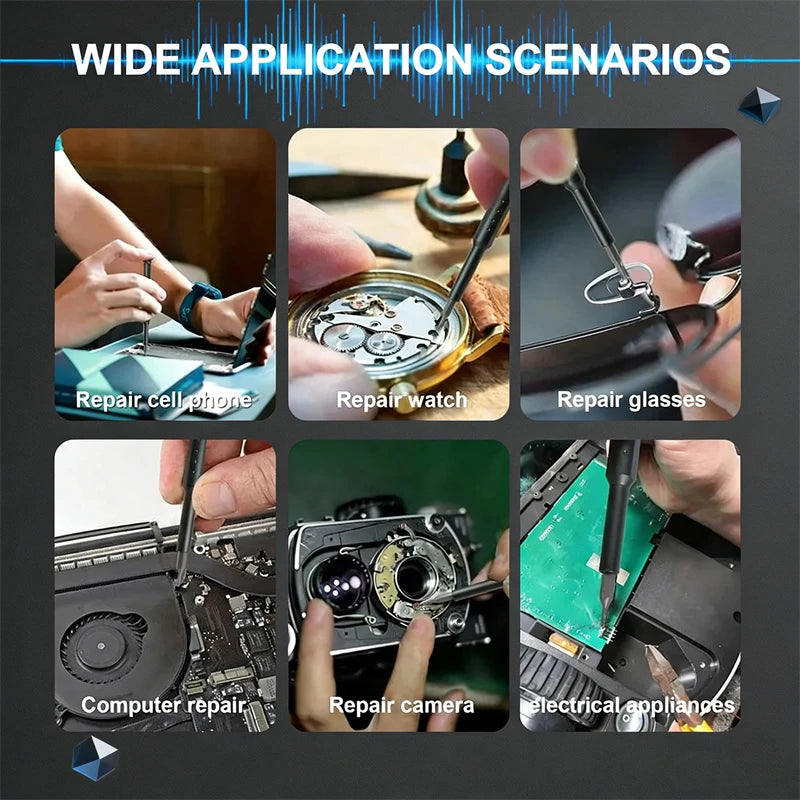
💡 See it in action
Why Do Screws Strip on Electronics Devices?
Most electronics use small screws made from relatively soft metals. These screws are designed for lightweight assembly rather than repeated removal.
Common causes of stripped screws include:
- Using the wrong screwdriver size
- Applying excessive force
- Using worn-out screwdriver bits
- Working at an angle instead of straight down
- Overtightening during reassembly
- Corrosion or thread damage
Have you ever tried turning a tiny screw only to watch the screwdriver spin uselessly inside the head? That's the classic sign of a stripped screw.
Signs a Screw Is Becoming Stripped
- Driver slips during rotation
- Screw grooves appear rounded
- Extra pressure is required
- Screw refuses to loosen despite movement attempts
Best Methods for Removing Stripped Screws
Stripped screws on electronics devices are usually removable using progressively stronger techniques. Start with the least invasive method and only move to advanced extraction when necessary. This approach reduces the risk of damaging circuit boards, housings, displays, and internal components.
- Use a rubber band between the screw and screwdriver.
- Switch to a correctly sized precision bit.
- Apply downward pressure while turning slowly.
- Use a specialized extraction tool.
- Create a new slot if the screw is severely damaged.
Method 1: Rubber Band Grip Trick
This popular technique works surprisingly well on lightly stripped screws.
- Place a wide rubber band over the screw head.
- Insert the screwdriver through the rubber band.
- Press firmly downward.
- Turn slowly counterclockwise.
The rubber fills gaps and improves traction between the bit and damaged screw head.
Method 2: Use a Larger Precision Bit
Sometimes a slightly different bit size creates enough contact to remove the screw.
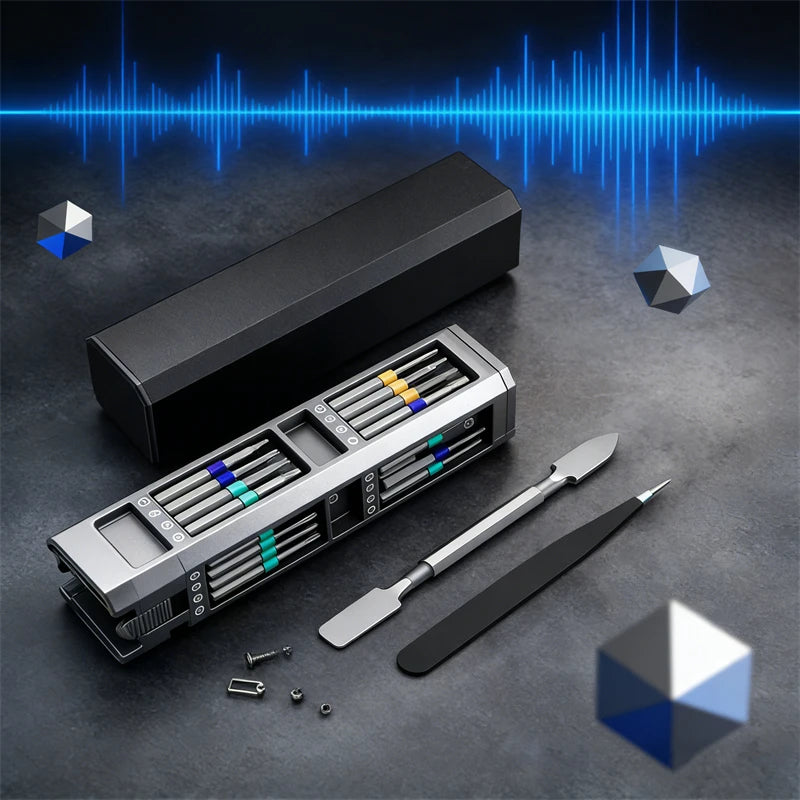
A quality 32-in-1 Precision Screwdriver Set offers multiple bit sizes, making it easier to find a better fit.
Method 3: Screw Extraction Tools
For severely damaged screws, extraction bits are often the safest solution.
These tools grip damaged heads by biting into the metal as you turn. Many electronics technicians rely on extraction bits when standard drivers fail.
| Method | Difficulty | Risk Level | Success Rate |
|---|---|---|---|
| Rubber Band | Easy | Low | Moderate |
| Correct Precision Bit | Easy | Low | High |
| Extraction Tool | Medium | Low | Very High |
| Cutting New Slot | Advanced | Medium | High |
How to Remove a Stripped Screw Step by Step
Prepare Your Workspace
- Use bright lighting
- Work on a stable surface
- Keep parts organized
- Disconnect power sources
- Use anti-static precautions when appropriate
Choose the Right Driver
Knowing how to fix electronics with precision screwdriver techniques starts with selecting the correct bit.
The bit should fully engage the screw head with no wobble. Even slight movement increases the chance of additional damage.
Apply Pressure Carefully
Press straight downward while turning slowly.
Many stripped screws become worse because users rush and apply torque before the bit is fully seated.
Escalate Gradually
If the screw doesn't move:
- Try a rubber band.
- Switch bit sizes.
- Use extraction tools.
- Create a slot as a last resort.
The 32-in-1 Precision Screwdriver Set includes multiple precision bits designed to improve grip on small electronics fasteners.
💡 See it in action
Why an S2 Steel Screwdriver Bit Set Makes Repairs Easier
An s2 steel screwdriver bit set provides better durability, tighter tolerances, and improved engagement with screw heads. Because S2 steel resists wear and deformation better than lower-quality materials, the bits maintain their shape longer and reduce slipping that often leads to stripped screws.
Benefits of S2 Steel Bits
- Higher wear resistance
- Improved precision fit
- Reduced cam-out and slipping
- Longer service life
- Greater repair confidence
Many electronics enthusiasts discover that upgrading their screwdriver bits immediately improves repair results.
Real-World Repair Scenario
Imagine replacing a laptop SSD. A worn bit slips and rounds a tiny screw. The repair stalls.
Using a properly sized S2 steel bit often prevents the damage entirely, allowing the screw to loosen cleanly on the first attempt.
Fixing Loose Screws on Devices Easily
Sometimes the issue isn't removal—it's preventing future problems.
Fixing loose screws on devices easily requires understanding why they loosen in the first place.
Common Causes of Loose Screws
- Vibration from movement
- Repeated opening and closing
- Plastic housing wear
- Improper torque during assembly
Best Practices During Reassembly
- Clean screw threads.
- Inspect for damage.
- Use the correct driver size.
- Tighten gradually.
- Avoid overtightening.
These simple habits reduce future stripping and improve device longevity.
User Feedback and Repair Experiences
Many DIY repair enthusiasts report significantly better outcomes when switching from generic drivers to dedicated precision screwdriver kits.
Common benefits include:
- Faster repairs
- Less screw damage
- Improved confidence
- Reduced replacement part costs
Common Mistakes That Make Things Worse
- Using excessive force
- Using incorrect bit sizes
- Ignoring early signs of stripping
- Working too quickly
- Using worn screwdriver bits
- Applying power tools to delicate electronics
One of the biggest mistakes is continuing to turn a screw after the driver starts slipping. At that point, changing tactics often saves the screw.
Tool Comparison Table
| Tool Type | Best For | Ease of Use | Recommended |
|---|---|---|---|
| Basic Screwdriver | General tasks | Moderate | Sometimes |
| Precision Screwdriver Set | Electronics repairs | Easy | Yes |
| S2 Steel Bit Set | Frequent repairs | Easy | Highly |
| Extraction Kit | Damaged screws | Moderate | Yes |
- Organize Small Tools For Travel Repairs: Simple Setup Guide
- Magnetic Screwdriver Tips: How To Use Them Without Losing Screws
- Screwdriver Bits Types: How To Pick The Right One Fast
Explore More:
- Set Of Precision Screwdrivers: Why Bit Variety Improves Repair Results
- Magnetic Bits Screwdriver: How It Compares To Leading Competitors
Pillar Article: Not Found
Explore More:


